Showing posts with label Hat. Show all posts

Saturday, September 1, 2007

zeebee photos

zeebee crown

short rows
garter stitch
Pattern: zeebee beanie
Designer: schmeebot
Yarn: Posh Yarn's "Love is..." colourway, in Eva 8 ply (aran weight) 45% cashmere, 55% silk
Needles: 4.5 mm
Techniques: provisional cast on, garter stitch, short row shaping, garter stitch grafting
More pictures: click here

Saturday, August 25, 2007

zeebee beanie

My zeebee beanie is finally done. I finished the knitting part at my usual pace and had fun with the short row technique. The construction of the hat is fun to watch develop as you knit. I also like the look of the completed crown. But I took weeks to get up the nerve to graft it together. If you read schmeebot's instructions on finishing this may make sense to you too. For me, I start quivering when I read, "should you stumble and mess up the last stitch." It doesn't much matter what comes next because all I feel is fear. My head knows this is silly. I mean, making a mistake while knitting will have very little lasting effect on my world. In fact I can always frog away and try again. Yes, my head knows this, but for my heart it's different.

If you are thinking of making a zeebee too, let me tell you, my heart was wrong! The finishing was fine, not perfect, but fine. schmeebot's writing assumes you are a knitting neophyte and therefore goes into great detail.

It is true, however, I had never done a garter stitch graft/Kitchener stitch. Now that took me some time to figure out. I started with the reverse stockinette graft two times before I finally figured out how to do do a garter graft/Kitchener Stitch.

I thought I would share my findings with you so that you too can do a reverse stockinette, AND garter graft/Kitchener Stitch! First I have embedded a YouTube video of the stockinette graft/Kitchener Stitch (for those of you struggling to teach yourself this stitch). For those who are already comfortable with this stitch scroll down to my table the shows you the differences between the graft stitches.


Grafting / Kitchener Stitch Table


TypePrep stitchesFront Needle (1st)Back Needle (2nd)

StockinetteF - S1: aitP*on; B - S1: aitK*onS1: aitK off; S2: aitP onS1: aitP off; S2: aitK on

Reverse stockinetteF - S1: aitK on; B - S1: aitP onS1: aitP off; S2: aitK onS1: aitK off; S2: aitP on

Garter**F - S1: aitP on; B - S1: aitP onS1: aitK off; S2: aitP onS1: aitK off; S2: aitP on


F = front needle; B = back needle; *aitP = as if to purl; *aitK = as if to knit; ** For this to work, ensure purl bumps are snug up against the front needle, and knit stitches are against the back needle.

Repeat as needed!

Picture of my zeebee beanie to follow. This beanie is supposed to be for me, but it doesn't suit my large melon head! So this zeebee will have a very limited life. But I am certain there will be other zeebee's in my future!

Monday, June 11, 2007

Multi-tasking

Brown Betty Teapot

I love tea and I was lucky enough to get a Brown Betty Teapot! It makes such lovely tea. One thing though, it cools off if we take our time drinking it. The solution, of course, is to make a tea cosy. And I have done it (Emu, No. 6196 - Striped Cosy with Pom-Pon). My love is teasing me that I now have truly become an old fogey! I will take pictures soon. / I tried the pom-pon but did not like it. Instead I crocheted a modified Bachelor's Button. I also crocheted a hot pad for the bottom of the teapot. / The yarn I have used is Patons Shetland Chunky - Earthy Brown and Canyon Variegated from my stash. / I had purchased this yarn for another Pick-up Diamond Helmet, Knitter's Magazine K77, Winter 2004, p. 46 (the one pictured here is also knit with Patons Shetland Chunky) but to make the tea cosy instead.

Shetland Chunky, Earthy BrownShetland Chunky, Canyon Variegated
Pick-up Diamond Helmet
Reversible Cable Knit ScarfI am also doing more work on my Reversible Cable Knit Scarf. I am loving it. (Sorry, this is an old photo.)
Catalina ShawlI have started the Catalina Shawl with Fiddlesticks Garnet Lace yarn. It is 50% silk and 50% merino wool. This is my first lace project and there has been a steep learning curve. I think I have had to rip out at least 5 times! I am making headway now. Pictures are coming.
Eva 8 plyAfter seeing Jared's zeebee and garter stitch scarf I knew I had to make one too. (see his entries for 5.29.2007 and 6.07.2007) I am making my own with Dee's Posh Yarn, Eva 8 ply cashmere & silk in Love is... colourway. Truly luscious!
Lady Godiva, RenaissanceAnd I have added another project to my list (the only one I will admit to today). I want to make a Clapotis wrap in Hand Maiden fine yarn, Lady Godiva, Renaissance Colourway. I bought this yarn from an American shop (lovely to do business with them) and had to pay duty when it arrived (ouch). And it burned all the more when I found out that Hand Maiden fine yarn is hand dyed in Canada!

I have not touched my Autumn Afternoons Cardigan since March...

Tuesday, June 5, 2007

Hip Hats

Title: Get Your Crochet On: Hip Hats & Cool Caps
Author: Afya Ibomu
Paperback: 128 pages
Publisher: Taunton (Nov 7, 2006)
ISBN-10: 1561588504
ISBN-13: 978-1561588503

Given my love of crocheting hats I knew I had to get this book when I saw it on the CraftSanity Blog here. I wasn't disappointed! It is appealing from the very start. Although a paperback, the paper weight is substantial. The cover is pre-folded 1/4" from the spine to help keep the book open without hands - a good design element for a pattern book. It is a colourful book with wonderful pictures and an easy to read style. The Getting Started section is targeted to the beginner. Afya has created the best set of crochet instructions I have seen. She has full colour pictures and diagrams to illustrate all the key points and step-by-step instructions. The diagrams are large and easy to understand. The "Making a Bib" (also called a bill) section is terrific; I haven't found this information elsewhere. Afya offers instructions for both a smaller or larger bib that can be added to many of her designs.

The 20 original designs are terrific. I think my favourites are The MC (Master of Ceremonies Rap Artist) a classic baseball cap, Queen (see picture), Kinky Reggae (this pattern is available for free on the CraftSanity Blog); Soon Come (similar to a newsboy-style cap), O.G. (Original gangsta) fedora type, Soldier (see picture), and Superfly. There are a few designs that are made to accommodate dreads. The patterns are clearly written. The only problem is that there are no measurements available for each finished project. The patterns either are for one-size or have small, medium and large adjustments.

All in all, this book is a very welcome addition to my crochet library. All my other crochet hat books have only caucasian models and many of the designs are downright hilarious. I think the beginner to the advanced crocheter would enjoy and use this book. Thank you Afya for publishing your work!

Getting StartedMaking a Bib
QueenSoldier

Saturday, June 2, 2007

Watermelon Hat

Sandia, by Sarah-Hope Parmeter
Have you seen the latest issue of MagKnits (June 2007)? This little hat is so cute. And with my hat obsession I may just have to knit it up! Check out this issue of MagKnits here.

ETA (2009-NOV-10): Unfortunately MagKnits is no more. However, if you are looking for Sarah-Hope's pattern, she has posted it on her blog at http://www.whatifknits.com/. Click HERE for the pattern. Hip-hip-hooray!

Tuesday, May 22, 2007

Mad Hatter

Click to enlargeClick to enlarge

Picture 1

Picture 2

I have fallen in love with making crocheted hats. It is so much fun and so fast!

This all started with an odd ball yarn (Clara by Filatura Di Crosa in Melon) . It is a lovely braided 100% wool yarn that is so soft and stretchy. I thought it would make a terrific hat, but for whom? (I confess, my lovely large head does not sport hats well.) Then I realized, I have a very good friend who is trying to grow her natural black hair. She feels it is at an awkward stage right now and loves to wear hats. I now had a project with a purpose!

I started with the Headhuggers There Are Holes In My Hat -- Skully Version pattern. The Clara turned out to be too bulky for this pattern. So, what to do? Go check out the LYS of course! (Note: I made the large adult size of this pattern - 16 rounds)

I came home with Lang Tosca in 059 (gold, orange, rust) and 095 (brown, red). It was so lovely to crochet with and so much fun with the changing colours.

I was having such a great time and couldn't stop there. I went out and got some cotton - Bernat Handcrafter Cotton in Potpourri Ombre. (I also got Sunkissed Ombre and Country Sage Ombre - at less than $1.50 a ball I couldn't resist.)

I learned how to make a Reverse Single Crochet border (see below)

Click to enlargeReverse Singe Crochet Border - At the end of your crochet row chain 1. Do not turn your work (or if you are working in the round, go in the counter clockwise direction). Insert your hook in the previous stitch. Wrap the yarn over the hook. Draw the yarn through the stitch. You will now have 2 loops on your hook. Wrap the yarn over your hook again and draw the yarn through both loops. Continue in this fashion to create a lovely border.

Picture 1: (L to R) Tam (variation on Skully) in Tosca 095 , Skully in Tosca 059, Skully in Potpourri Ombre, Mesh Cap (Hooked Hats, 20 Easy Crochet Projects p. 29) in Clara with some Cotton and Tosca.

Picture 2: Side view of the Tam in Tosca 095 (the brim is in Lily Cotton Sugar'n Spice Worsted Warm Brown)

Wednesday, March 28, 2007

thank you canada post


The sweaters arrived! And don't the brothers look smart wearing these Cowichan type sweaters! The youngest was very happy to get the sweater & hat. The older brother thinks the sweater is okay. At nearly 7 years of age clothes don't make a very exciting gift. It's a good thing I included chocolate!

Initial Post: tag-a-long

Tuesday, March 20, 2007

tag-a-long

I am so excited! I have just finished a project for my nephews & I am getting ready to ship the result to them. My wonderful nephews are 6 years, 10 months and 2 years, 2 months old. The older brother is a wonderfully loving guy and the younger brother wants to be just like him! They are quite a sweet pair. I don't get to see them enough.

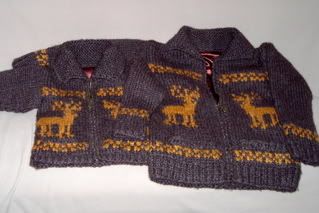
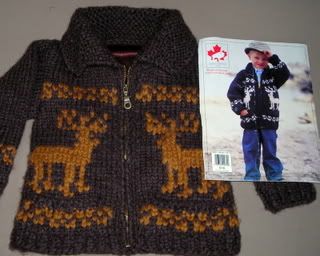
That's where this project fits in; Matching Cowichan Style Jackets & Matching Hats!


Matching Jackets
Source: From the North (White Buffalo 102) Featuring Designs from the Canadian Sweater Company Ltd. Since 1977

ISBN: 1-894411-52-8

Pattern: Snowflake Jacket, Size 4 (3 cakes main, 1 cake contrast) & 8 (4 cakes main, 1 cake contrast) page 17

Yarn: White Buffalo, Unspun, 6 strands, 100% Wool (unfortunately discontinued - a similar yarn may be found at Custom Woolen Mills Bulky 6 strand. ), 1 cake = 227 gm / 8 oz

Tension: 11 sts and 15 rows = 10 cm in stocking stitch with 6.5 mm needles

Wraps Per Inch (WPI): 10/3"


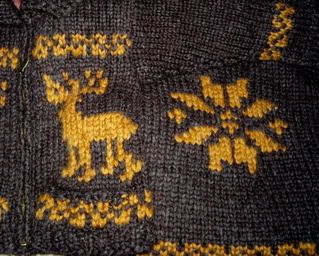
Front - Reindeer, back - snowflake


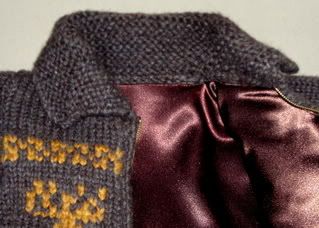
And, here is where I really went all out -they are lined!

I remember a beautiful pink fluffy sweater I had when I was a tot - I loved that sweater. I tried to wear it - but it was too itchy. I could not tolerate it for long. This memory prompted me to line these jackets with satin. It will make the jackets slide more easily over shirt sleeves too.
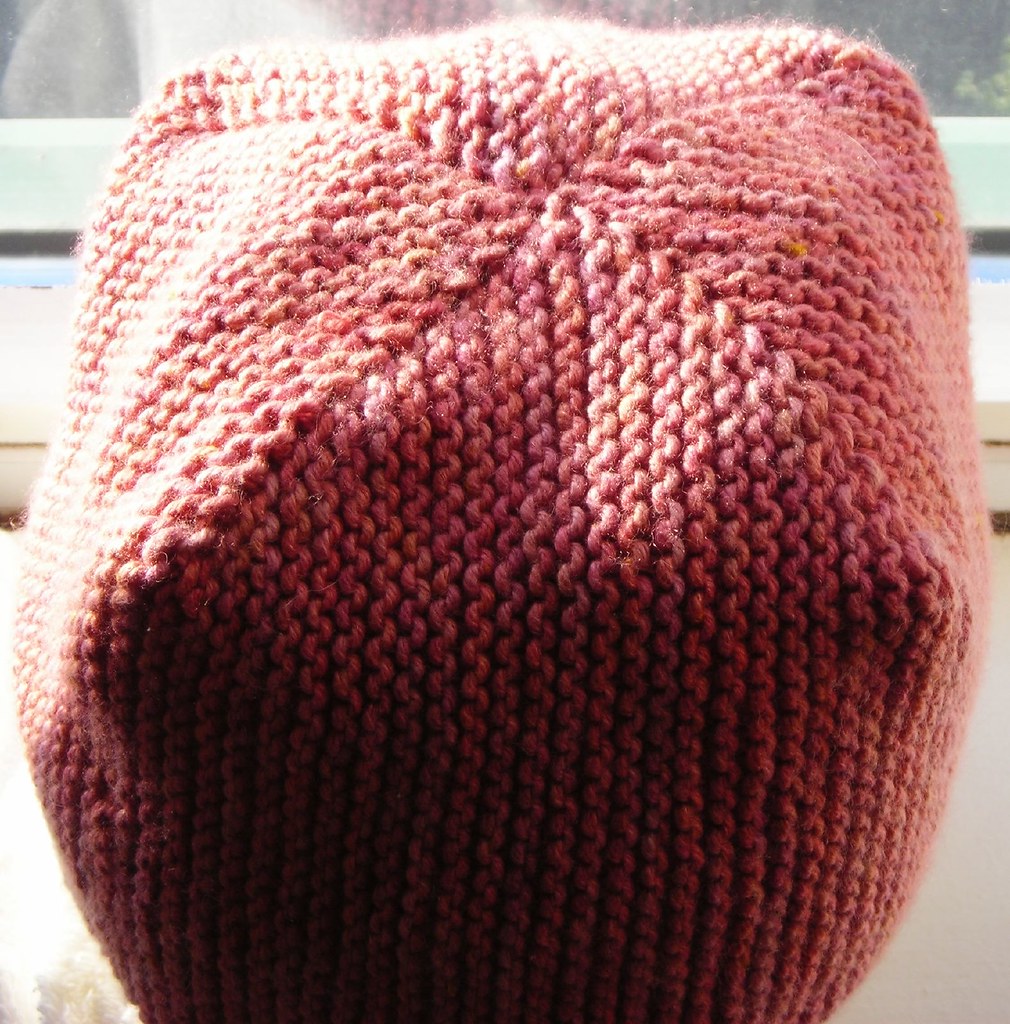
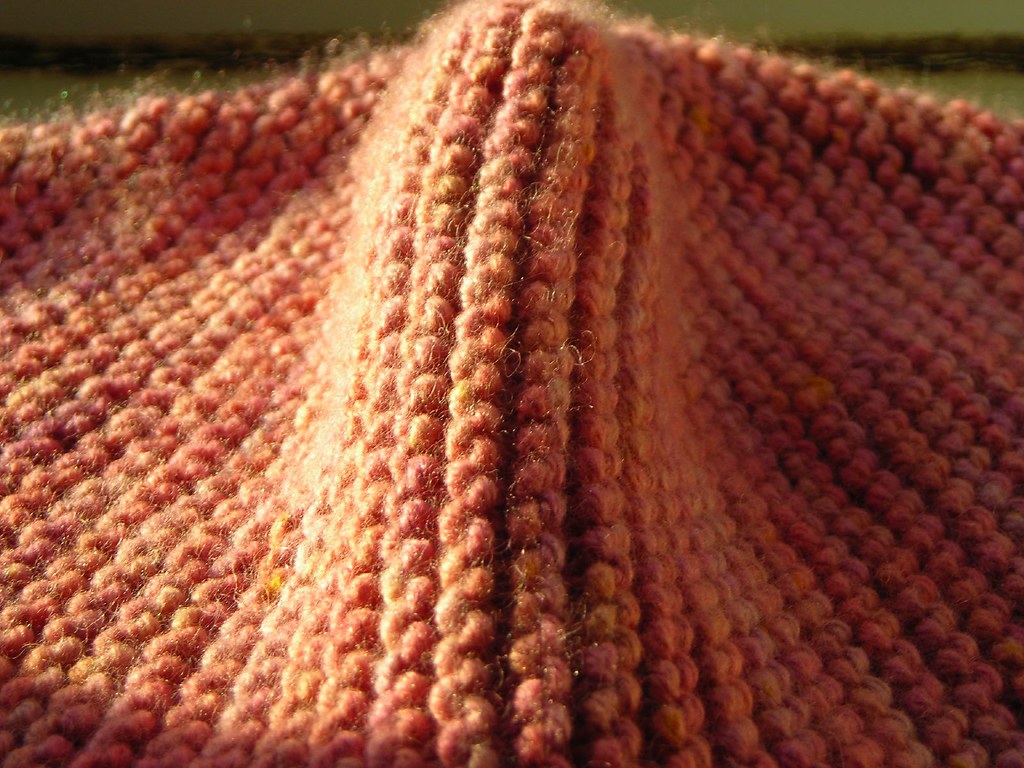
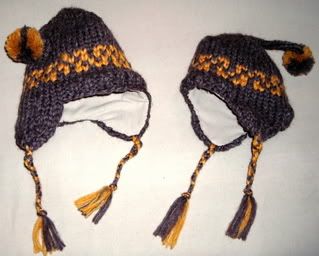
Matching Hats

Source: Handknit Holidays (Knitting Year-Round for Christmas, Hanukkah, and Winter Solstice)

Author: Melanie Falick

ISBN: 1-58479-454-2

Pattern: Elf Caps - Earflap, Designer Michelle Heyman, Size Small (19") and Medium (21"), made with left overs from the jackets, page 166

Yarn: White Buffalo, Unspun, 6 strands, 100% Wool (unfortunately discontinued - a similar yarn may be found at Custom Woolen Mills Bulky 6 strand. ), 1 cake = 227 gm / 8 oz

Tension: 8 sts and 11 rows = 10 cm in stocking stitch with 10 mm DPN
Wraps Per Inch (WPI): 10/3"

Lined with fleece.

Ties: 4-strand Braid Ties (page 169)


I really enjoyed working with this yarn. It is very soft and knits up well. The Yarn Harlot comments on White Buffalo here on her blog. Another review of this yarn is found on the Knitter's Review.
I like that there are no joins between balls. When you start a new ball of the same colour, you splice the two ends by breaking off half the strands about 6 inches from the end of each ball and overlapping the remaining strands. Just continue knitting as you normally would!
I'll write more when my nephews get the sweaters. This is going to be a big surprise!

To see authentic Cowichan Sweaters you can click this link.

Followup post: thank you canada post